
No-Code Automation Builder
Goal: Build a visual workflow that connects APIs, AI models, webhooks, and transforms, then pack and deploy it as a single binary that anyone can run with npx, with zero backend code.
This recipe uses Habits Base, a local drag-and-drop node canvas, to design the workflow, and Cortex Server to run it. The final artifact is a .habit file: a self-contained binary that includes your workflow, any custom UI, and all dependencies.
What you'll end up with
A deployed automation accessible at a URL, packaged as a portable .habit file that anyone can run with:
npx habits@latest cortex --config your-habit.habitUsers fill a form, the workflow runs, and results appear in the browser, no code needed on their end.
Tools used
| Tool | Role |
|---|---|
| Base | Visual canvas for building the workflow |
| Cortex Server | Runs the habit locally for testing and in production |
Step 1, Open the visual canvas
Start Base locally:
npx habits@latest baseBase opens in your browser at http://localhost:3000. You'll land on an empty canvas.
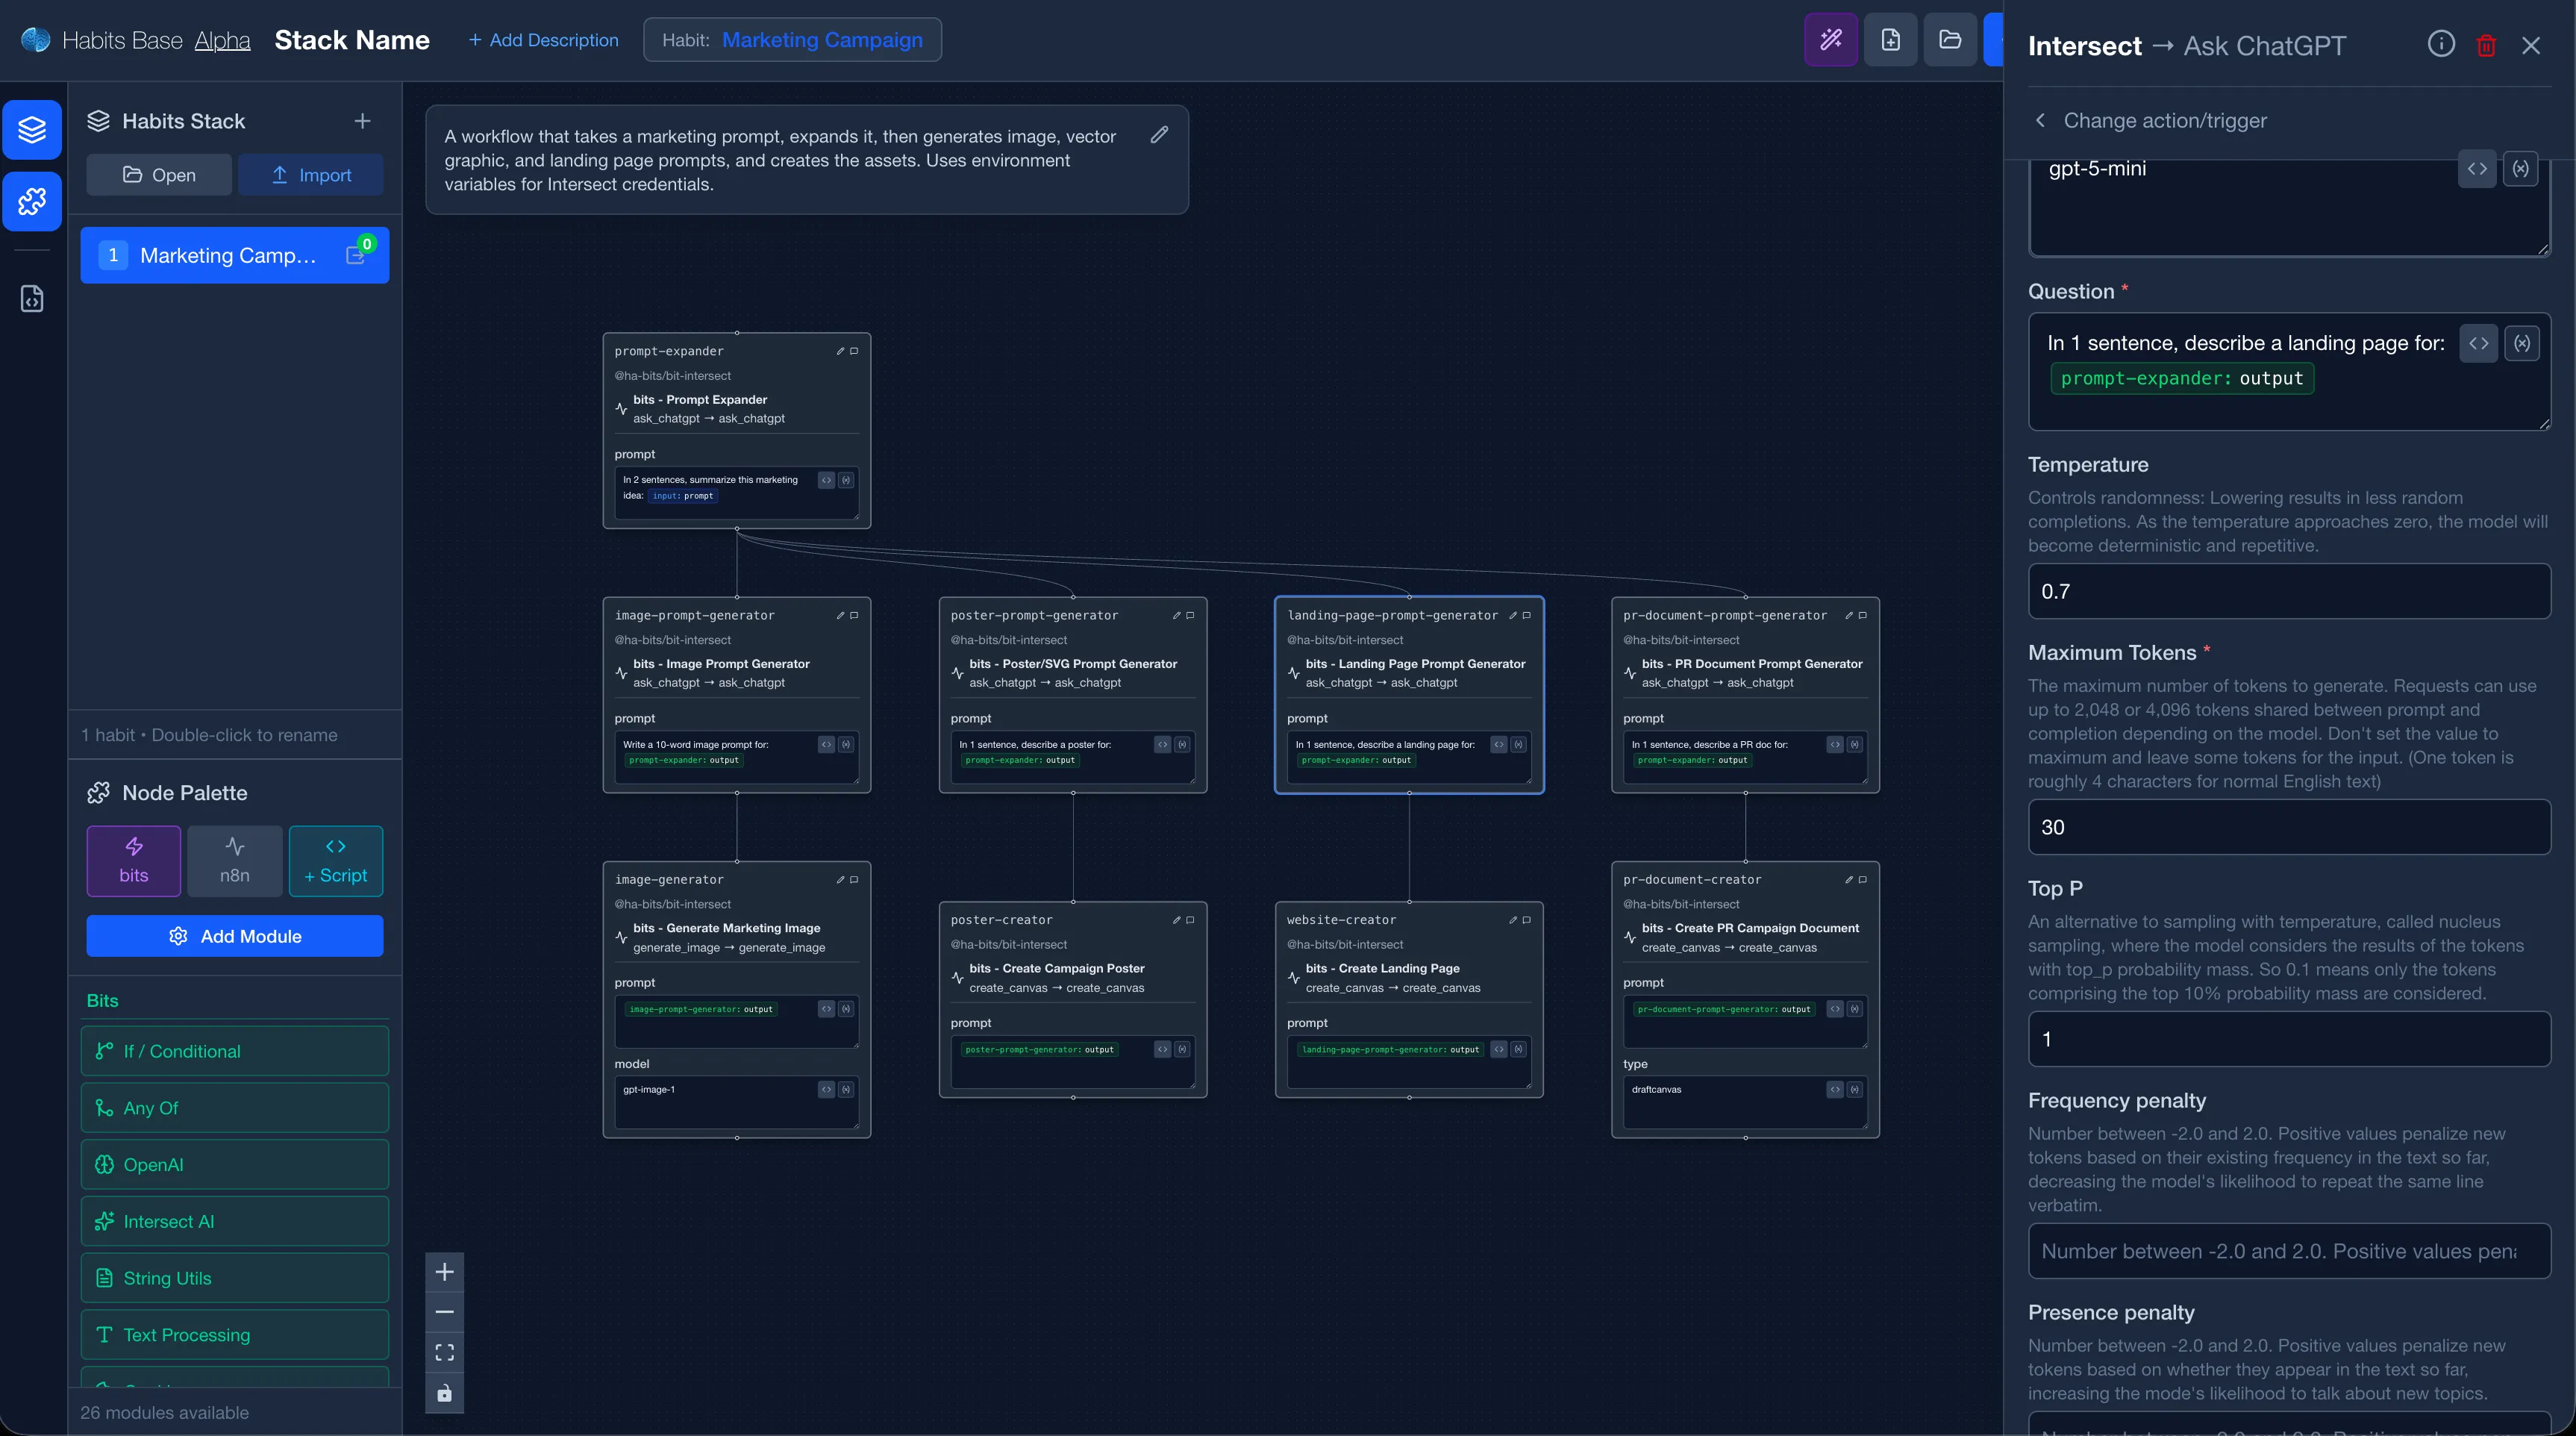
The canvas is a flow editor. Nodes are actions (API call, AI prompt, transform, etc.). Edges connect the output of one node to the input of another. The workflow runs top-to-bottom along those edges.
Step 2, Add and connect nodes
Click the + button or drag from the node palette on the left side of the canvas.
Key node categories:
| Category | Examples |
|---|---|
| Triggers | HTTP webhook, form submission, schedule (cron), manual run |
| AI | OpenAI chat, vision prompt, embeddings, Intersect AI |
| Data | HTTP request, database query, file read/write |
| Logic | If/Else condition, loop, merge, split |
| Transform | JSON parse, template, extract fields, format |
| Output | Return to form, send email, write to DB |
Connect nodes by dragging from an output handle (right side of a node) to an input handle (left side of the next node). The data flows along those edges at runtime.
Naming nodes matters. The output of node extract-text is referenced in later nodes as {{extract-text}}. Give nodes short, descriptive IDs, you'll use them in template expressions throughout the workflow.
Step 3, Configure each node
Click a node to open its configuration panel. For an OpenAI node, you set:
- Operation,
ask_chatgpt,vision_prompt,generate_image, etc. - Model,
gpt-4o,gpt-4o-mini, etc. - Prompt, a static string or a template using
{{node-id}}to reference upstream output
Template expressions let you chain outputs:
prompt: |
  Resume text: {{extract-text}}
  Company: {{habits.input.companyName}}
  Write a cover letter.
{{habits.input.companyName}} reads a field the user filled in the form. {{extract-text}} reads the output of the extract-text node.
Step 4, Run and inspect in real time
Click Run in the toolbar. If your habit has a form, the canvas switches to form preview mode, fill the inputs and submit.
Each node shows a status badge while running: pending → running → done (or error). Click any node after a run to see:
- The exact input it received
- The exact output it produced
- Execution duration
- Any error with a full stack trace
This is the fastest way to debug: the problem is always in the node that turned red. Fix its config, re-run, repeat.
Tips for building reliably:
- Build one node at a time. Add a node, run, confirm the output looks right, then add the next. Don't wire up five nodes before running for the first time.
- Use the template preview. When editing a prompt or template expression, the config panel shows a live preview of what the expression resolves to using the last run's data.
- Save intermediate outputs. For expensive nodes (like an AI call), add a Transform node after it to save the output to a named variable. If you re-run just the downstream half of the workflow, you won't re-invoke the AI.
Step 5, Pack into a single file
When the workflow runs correctly end-to-end, click Pack in the Base toolbar (or use the CLI):
npx habits@latest pack --output my-habit.habit
The .habit file contains:
- The workflow YAML
- Any custom frontend (React, Vue, plain HTML)
- All referenced node modules, bundled
- A
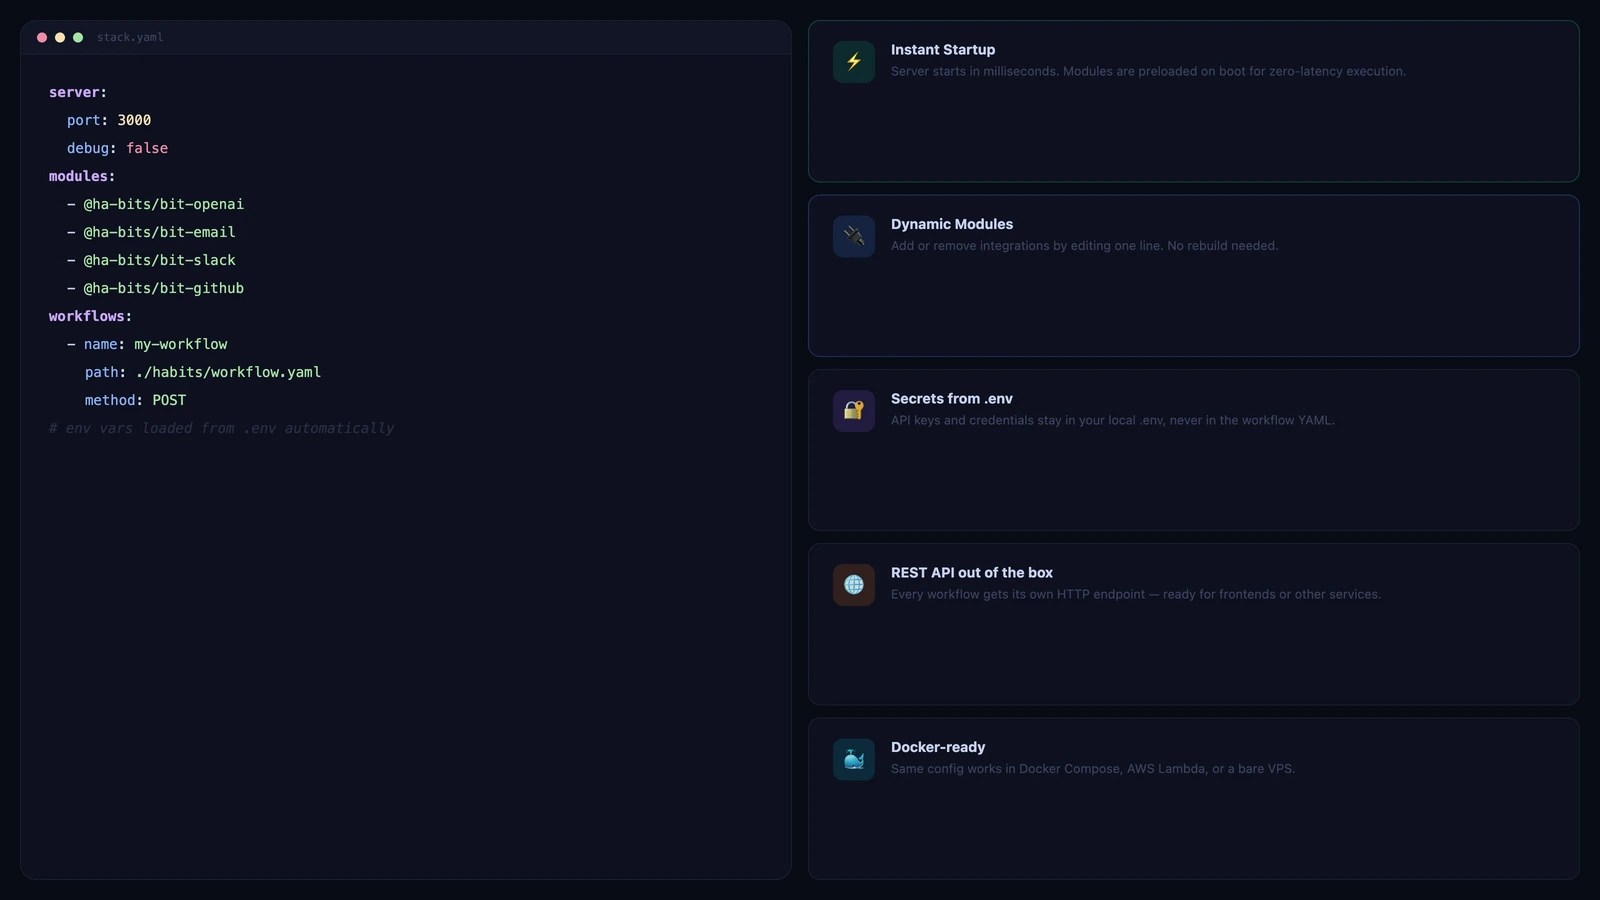
stack.yamlmanifest that Cortex uses to start the habit
The file is typically 1–5 MB. It's self-contained, there's no node_modules to install, no environment to configure.
Running the packed habit
Locally:
npx habits@latest cortex --config my-habit.habitOn a server:
docker run -p 3000:3000 -v $(pwd)/my-habit.habit:/habit.habit \
  habits/cortex:latest cortex --config /habit.habit
Via Admin (for team deployment): Upload the .habit file to the Admin library and assign it to a subdomain. See the Company Hub recipe.
Workflow design patterns
Fan-out and merge
Run multiple AI calls in parallel, then merge their results:
trigger → parallel-split → [ai-call-1, ai-call-2, ai-call-3] → merge → outputThe merge node waits for all upstream nodes to complete before continuing.
Conditional branching
Use an If node to route the workflow differently based on a value:
form-input → if (score > 0.8) → [high-quality-path | low-quality-path] → outputLooping over a list
Use a Loop node to apply the same sub-workflow to each item in an array. The loop exposes {{loop.item}} and {{loop.index}} inside its body.
Human-in-the-loop
You can pause a workflow and wait for a human decision by emitting an intermediate response to the form UI, then resuming when the user clicks a button. This is useful for approval flows or review steps.